Standard Operating Procedure (SOP) for Friability Test Apparatus in pharmaceuticals

1.0 OBJECTIVE: To establish a procedure for the cleaning, operation, and calibration of the friability test apparatus.
2.0 SCOPE: This procedure is applicable to the cleaning, operation, and calibration of the friability test apparatus used in the production department.
3.0 RESPONSIBILITY: Officer, Executive – Production Department
Manager – Production Department
QA Officer – In-process
4.0 DEFINITIONS:
NA (Not Applicable)
5.0 PROCEDURE:
5.1 Cleaning:
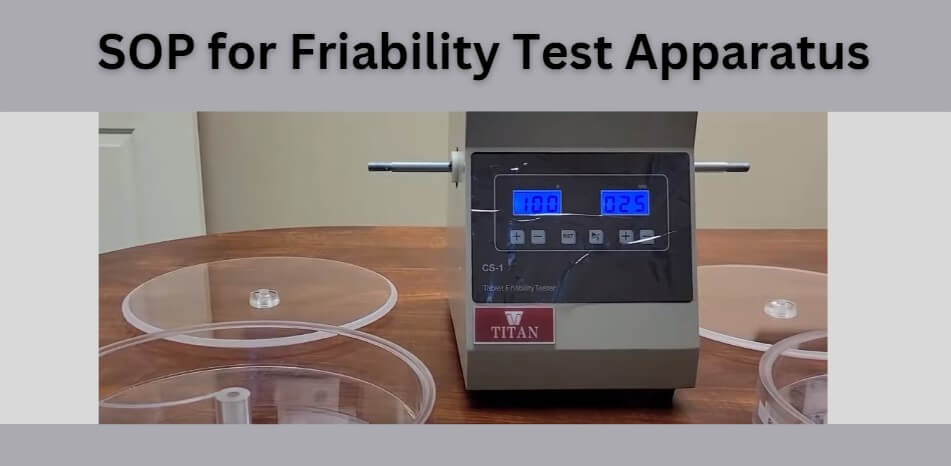
5.1.1. Remove the acrylic drums by pressing the provided knobs.
5.1.2. Pull the tablet-collecting tray outside to remove it.
5.1.3. Dry-clean the equipment and acrylic drums using a dry lint-free duster.
5.1.4. Attach the drums with covers back to the equipment.
5.2 Operation:
5.2.1. Ensure the equipment is cleaned.
5.2.2. Turn on the power supply.
5.2.3. The display will show ‘’START’’.
5.2.4. Setting the time:
5.2.4.1. Press the ‘’ TIME’’ button.
5.2.4.2. Set the time to 4 minutes using the numerical buttons on the panel.
5.2.4.3. Press the ‘’ENTER’’ button; the display will show ‘’ 0.00.00’’.
5.2.5. Setting the counts:
5.2.5.1. Press the ‘’COUNT’’ switch.
5.2.5.2. Set the count to 100 using the numerical buttons on the panel.
5.2.5.3. Press the ‘’ENTER’’ button; the display will show ‘’ 00000’’.
5.2.6. Weigh the tablets initially.
5.2.7. Load the weighed tablets into the slit provided in the drum.
5.2.8. Switch on the apparatus.
5.2.9. After 100 rotations, the equipment will stop, and the tablets will automatically go to the tray provided.
5.2.10. Remove the intact tablets, brush off any loose dust with a soft brush, and weigh them.
5.2.11. Calculate the friability using the formula: (Initial weight – Final weight) / Initial weight x 100. Record this in the BMR.
5.2.12. Turn off the power supply.
5.2.13. Clean the equipment as per step 5.1.
5.3 Calibration:
5.3.1. Attach an RPM counting sticker on the drum.
5.3.2. Operate the instrument as described in step 5.2.
5.3.3. Set the rotation control button to 25 rotations and start the instrument.
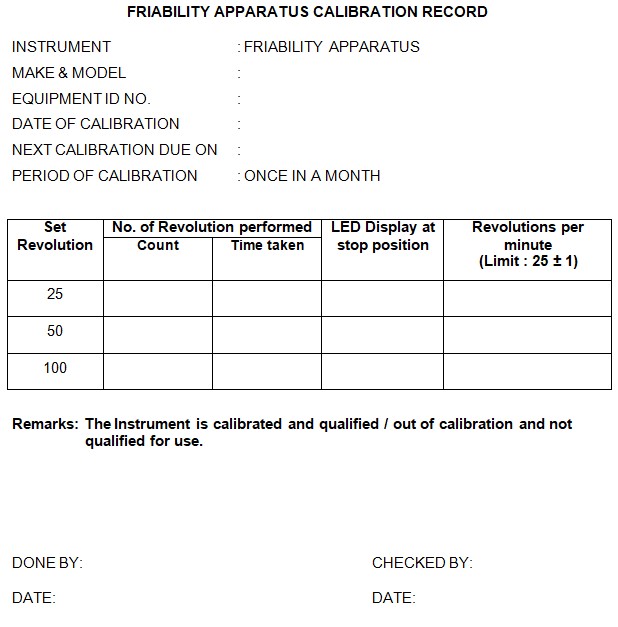
5.3.4. Manually count the number of rotations in one minute using a calibrated stopwatch or a calibrated digital tachometer. Record the observations in Annexure-I.
5.3.5. Repeat steps 5.3.3 and 5.3.4 for 50 and 100 set RPM.
5.3.6. Affix a calibration status label, duly filled and signed, on the equipment.
5.3.7. If any discrepancies are observed, affix an ‘UNDER MAINTENANCE’ status label, inform the department head and engineering department for corrective action.
5.3.8. Do not use the friability apparatus until the problem is rectified.
5.3.9. After rectification, re-calibrate the friability apparatus and record it in Annexure-I.
5.3.10. Note: Repeat the same operation with fresh tablets if a power failure occurs during the operation.
Related SOP: SOP on Fluid Bed Dryer
6.0 ABBREVIATIONS:
QA: Quality Assurance
SOP: Standard Operating Procedure
RPM: Rotations Per Minute
7.0 REFERENCES:
NA
8.0 ANNEXURE:
ANNEXURE – I: Friability Test Apparatus Calibration Record.

