Procedure for Punches and Dies Inspection is required to maintain the quality and purity so that it can used further in upcoming process batches.

1.0 Objective: To establish a procedure for inspecting punches and dies.
2.0 Scope: This procedure pertains to the inspection of punches and dies in the production department using a punch inspection kit.
3.0 Responsibility: Officers and Executives in the Production Department
Managers in the Production Department
4.0 Procedure:
4.1 Tip Diameter of Punches:
4.1.1 Check the tip diameter using a micrometer.
4.1.2 Verify the micrometer’s zero error.
4.1.3 Position the punch tip vertically between the micrometer jaws.
4.1.4 Turn the micrometer knob until it stops, recording the reading where the knob gives a sound.
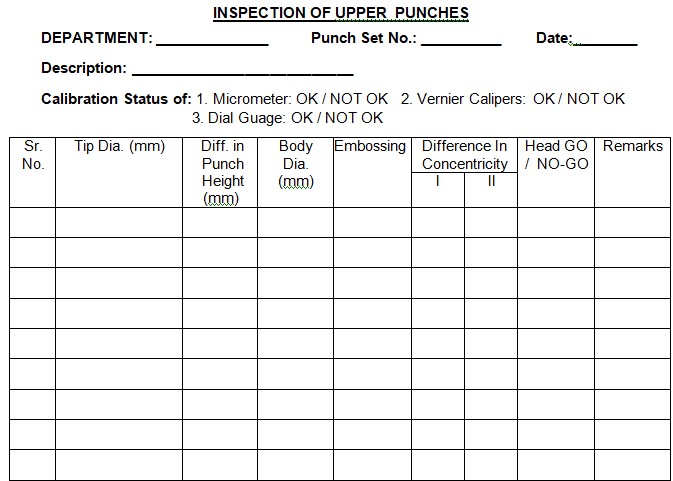
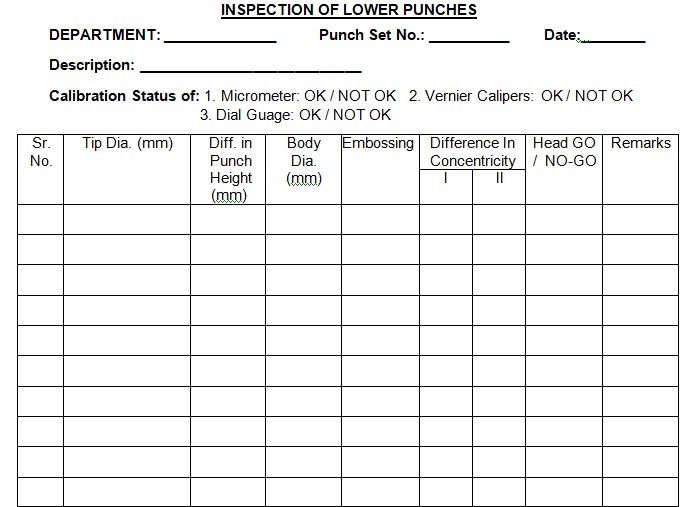
4.1.5 Check the micrometer’s fine setting and record the reading in Annexure-I.
4.1.6 The readings should be within ± 0.1 mm.
4.2 Difference in Height of Punches:
4.2.1 Set the dial gauge of the inspection kit to zero using a standard punch.
4.2.2 Place each punch inside the punch holder over the metal pad of the inspection kit to measure deflection from the zero position.
4.2.3 Record the differences in Annexure-I.
4.2.4 The difference should not exceed ± 0.08 mm.
4.3 Body Diameter of Punches:
4.3.1 Measure the body diameter with a micrometer.
4.3.2 Account for the micrometer’s zero error.
4.3.3 Position the punch body horizontally between the micrometer jaws.
4.3.4 Turn the micrometer knob until it stops, recording the reading where the knob gives a sound.
4.3.5 Record the reading in Annexure-I.
4.3.6 The readings should be within ± 0.1 mm.
4.4 Standard dimensions:
4.4.1 D tooling: 25.4mm
4.4.2 B tooling: 19.0mm
4.4.3 BB tooling: 19.0mm
4.5 Embossing of Punches:
4.5.1 Visually examine the embossing and note remarks in Annexure-I.
4.6 Difference in Concentricity of Punches:
4.6.1 Position the punch horizontally on a ‘V’ block pad and set the dial gauge to zero over the punch body.
4.6.2 Rotate the punch clockwise, taking readings from the top and bottom of the punch body, and record the observations in Annexure-I.
4.6.3 Deflection should be within ± 0.05 mm.
4.7 Head Go and No-Go of Punches:
4.7.1 Move the punch heads between GO and NO-GO standards.
4.7.2 The punch head should pass GO but not NO-GO.
4.7.3 Record the observations in Annexure-I.
4.8 Outer Diameter of Dies:
4.8.1 Measure the outer diameter of the die using a vernier caliper.
4.8.2 Consider the vernier caliper’s zero error.
4.8.3 Position the die horizontally between the vernier caliper jaws.
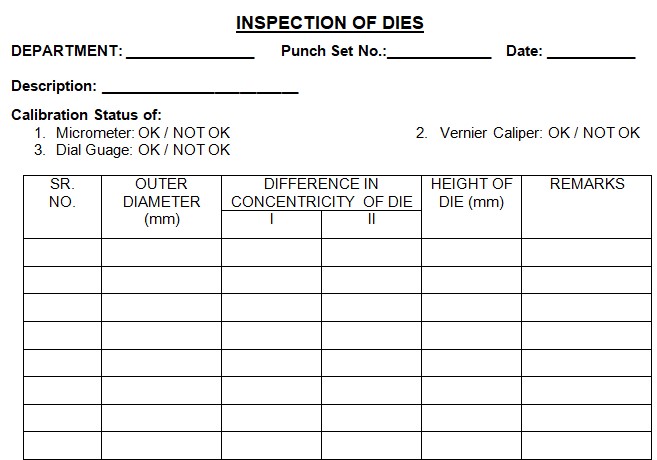
4.8.4 Record the reading in Annexure-II.
4.8.5 Readings should be within ± 0.05 mm.
Related SOP: SOP for Polishing of Punches and Dies
4.9 Standard dimensions:
4.9.1 D tooling: 38.1mm
4.9.2 B tooling: 30.15mm
4.9.3 BB tooling: 24.0mm
4.10 Height of the Die:
4.10.1 Measure the die height using a micrometer.
4.10.2 Account for the micrometer’s zero error.
4.10.3 Position the die vertically between the micrometer jaws.
4.10.4 Turn the micrometer knob until it stops, recording the reading where the knob gives a sound.
4.10.5 Record the reading in Annexure-II.
4.10.6 Readings should be within ± 0.1 mm.
4.11 Standard dimensions:
4.11.1 D tooling: 23.82mm
4.11.2 B tooling: 22.22mm
4.11.3 BB tooling: 22.22mm
4.12 Difference in Concentricity of Dies:
4.12.1 Position the die horizontally on a ‘V’ block pad and set the dial gauge to zero over the die body.
4.12.2 Rotate the die clockwise, taking readings from the top and bottom of the die body, and record the observations in Annexure-I.
4.12.3 Deflection should be within ± 0.05 mm.
Note: Verify the calibration status of measurement tools before use and record them as O.K./NOT O.K. in the respective annexure.
Do not use measurement tools that are due for calibration.
Frequency: Inspect punches and dies after receiving a new punch set and after compressing two million tablets per punch sub-set.
Related SOP: SOP on Operating Procedure for 35-Station Double Rotary Compression Machine
5.0 Abbreviation:
QA: Quality Assurance
6.0 References:
None
7.0 Annexures:
ANNEXURE – I: Inspection of Punches
ANNEXURE – II: Inspection of Dies
ANNEXURE –III: Inspection of Dies
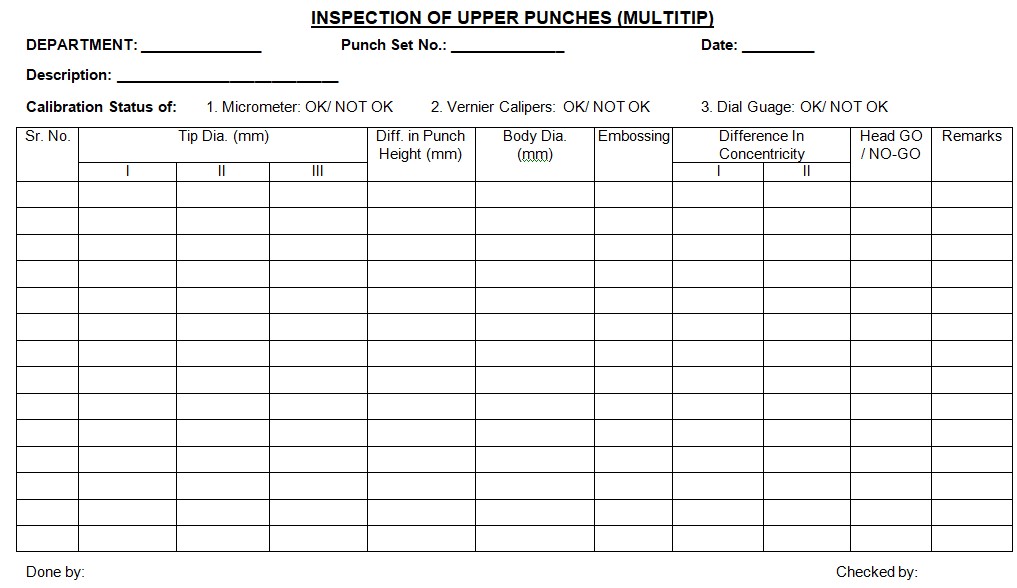
ANNEXURE – IV: Inspection of Upper Punches (Multitip)
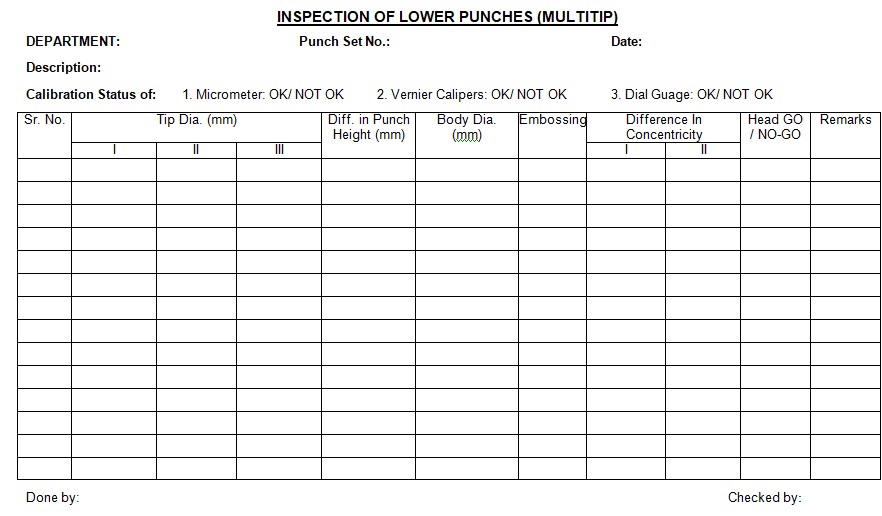
ANNEXURE – V: Inspection of Lower Punches (Multitip)
