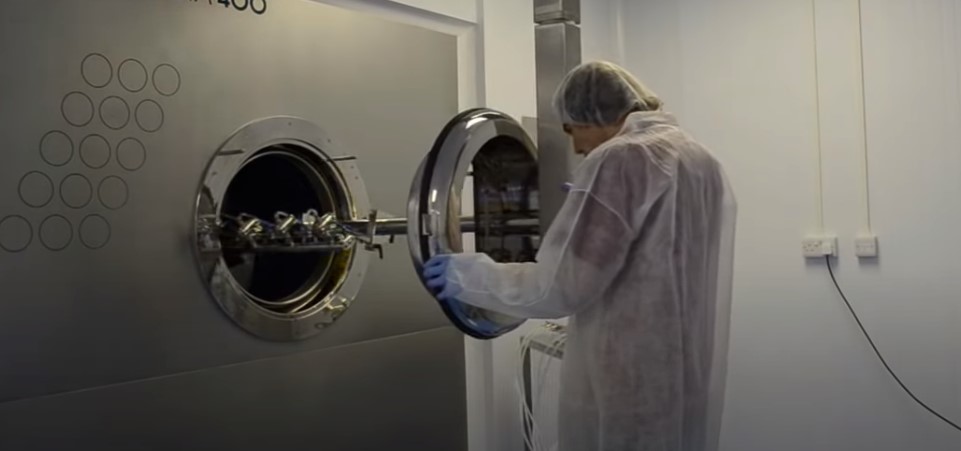
1.0 OBJECTIVE: The objective of this procedure is to establish guidelines for operating the Auto Coater effectively.
2.0 SCOPE: This procedure applies to the operation of the Auto Coater situated in the manufacturing area.
3.0 RESPONSIBILITY: The Officer, Executive, and Manager from the Production Department are responsible for carrying out this procedure.

4.0 DEFINITION(S):
N/A
5.0 PROCEDURE:
5.1 Machine Setting:
- Follow the steps below to set up the machine properly:
- Ensure that the machine/ equipment and its surrounding area are clean. Attach the ‘UNDER PROCESS’ label, duly filled and signed, to the equipment. Record this observation in the Equipment Usage Log Sheet according to SOP “Making entries in equipment usage and cleaning log sheet“.
- Verify that the compressed air and main electric supply are turned on from the service area.
- Ensure that the discharge valve is closed.
- Check that the compressed air pressure on the pressure gauge is approximately 4 Mpa.
- Turn the power key to the ‘OFF’ position. The MMI will turn off.
- Switch on the control panel by setting the Control ‘ON/OFF’ switch to the ‘ON’ position. The opening screen will appear on the MMI.
- Select ‘FILM COATING’ on the MMI to access the operation screen, which provides the following menu options:
- Main coater start/stop
- Exhaust start/stop
- Supply fan start/stop
- Agitator start/stop
- Gun sliding system out/in
- Open the door of the auto coater and select ‘GUN SLIDING OUT’ on the MMI. The gun assembly will slide out. Ensure that the spray nozzles are open and clean.
- Load the core tablets into the pan. Select ‘GUN SLIDING IN’ on the MMI to slide the gun assembly inside. Make sure that the distance between the tablet bed and the spray gun is between 10 to 14 inches.
- Position the bed temperature sensor in such a way that it does not touch the baffles of the pan, and the coating solution does not get sprayed over it during the coating operation.
- Close the door of the auto coater.
- Confirm that the discharge valve of the solution tank is closed. Load the coating solution into the tank and lock the lid securely.
- Select ‘AGITATOR START’ on the MMI to start the agitator.
- Set the supply air and exhaust air temperatures as specified in the respective Batch Manufacturing Record (BMR). Adjust the values by pressing the ‘UP/DOWN’ arrow key on the control panel.
- Set the RPM (Rotations Per Minute) for the main pan, exhaust fan, and supply fan by selecting the ‘▲/▼’ symbol on the respective parameter on the MMI. A keypad screen will appear. Load the desired RPM and then select ‘E’ followed by ‘CLOSE.’ The loaded RPM will be displayed.
- Select ‘MAIN COATER START’ and turn the pan’s ‘ON/OFF’ knob to the ‘ON’ position. The pan will start running according to the set RPM.
- Select ‘EXHAUST FAN START’ on the MMI to start the exhaust fan.
- Select ‘SUPPLY FAN START’ on the MMI to start the supply fan.
- Wait until the tablet bed reaches the temperature specified in the BMR.
- Set the atomization pressure for Gun-1, Gun-2, and Gun-3. Ensure that the airflow is approximately the same for all three guns.
- Select ‘SPRAY SCREEN’ on the MMI to open the film spray screen.
- Select ‘MANU’ on the MMI to activate the manual mode operation.
- Turn on Gun-1, Gun-2, and Gun-3 by selecting the respective guns on the MMI.
- Press the ‘ON’ button on the control panel to start the spray.
- Use the ‘UP/DOWN’ key to adjust the RPM of the peristaltic pump.
- Press ‘STOP’ on the peristaltic pump to stop it.
- The coating solution spraying will cease.
- To take samples of coated tablets for in-process checking, stop the peristaltic pump. Open the door and collect the sample.
- Close the door and restart the peristaltic pump by pressing the ‘START’ key on the peristaltic pump.
- Upon completion of the coating operation, press ‘STOP’ on the peristaltic pump. The coating solution spraying will stop. Turn off the agitator.
- Allow the supply and exhaust fans to continue until the tablet bed is completely dry.
- Select ‘ALARM SCREEN’ on the MMI to open the alarm screen. Select ‘RESET’ on the MMI. The MMI will restart, and the opening screen will appear. Select ‘FILM COATING’ on the MMI to access the operation screen.
- Turn the pan’s ‘ON/OFF’ knob to the ‘OFF’ position. To stop the exhaust and supply, select ‘STOP’ for the respective parameters. The exhaust fan and supply fan will stop.
- Open the door and adjust the bed temperature sensor to ensure that it does not touch the discharge chute. Assemble the discharge chute and close the door. Place a clean, pre-labeled, double polybag-lined stainless steel bin below the discharge.
- Turn on the pan. The discharge process will commence.
- Ensure that the pan is completely discharged. Switch on the lamp if necessary.
- Turn the pan’s ‘ON/OFF’ knob to the ‘OFF’ position. Turn the power key to the ‘OFF’ position. The MMI will turn off.
- Attach a ‘TO BE CLEANED’ label, duly filled and signed, to the machine. Record the observations in the equipment usage log sheet according to SOP “Making entries in equipment usage and cleaning log sheet”.
6.0 ABBREVIATION(S):
BMR: Batch Manufacturing Record
MMI: Man-Machine Interface
SOP: Standard Operating Procedure
Mpa: Milipascal
7.0 REFERENCE(S):
Making entries in equipment usage and cleaning log sheet.
8.0 ANNEXURE(S):
Nil
